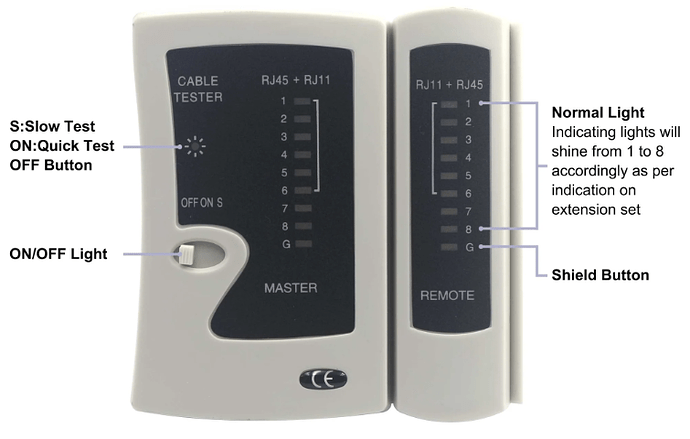
Testing the Ethernet cable is an essential part of Ethernet cable termination. It can be challenging for novices to use the network tester and read the test report correctly; here is a brief guide.
For home and office network installations, the basic network tester is enough for daily use. I’ll tell you some tips for using these RJ45 testers. Most network testers on the market come with instructions; if your product doesn’t have full instructions, you can take a look at the following guide.
A basic network tester can be used for both RJ45 and RJ11 connectors. It is composed of two parts: the master and the remote tester. The master and remote testers feature LED lights to show the network cable problems.
Here’s what the LED light patterns on a basic network tester signify:
-
If lights on the network tester shine from 1 to 8, it means your unshielded Ethernet cable is correctly terminated, and all eight conductors are properly connected. If the lights illuminate from 1 to G, it indicates that your shielded cable is properly grounded, which is essential for reducing interference and providing a stable connection.
-
If fewer than two wires are connected, none of the lights on the tester will be illuminated.
-
If one of the wires has an open circuit, the LED light corresponding to that wire on both the master and remote testers will not shine. For example, if the NO.5 wire has an open circuit, the NO.5 lights on both testers will remain off.
-
If two ends of a cable are in disorder, e.g., NO.3 and NO.5, the master and remote tester will display as follows:
Master Tester: 1-2-3-4-5-6-7-8-G
Remote Tester: 1-2-5-4-3-6-7-8-G
By understanding these light patterns, you can confidently test your Ethernet cables for issues, ensuring your network connection is stable and reliable.
